Para editores e proprietários
Layers and editing
Make layers, add fields, calculate areas and lengths, draw, change, merge and clip features, and work on delivered data through editable copies.
Esta página ainda não está traduzida para o seu idioma; é mostrada em inglês.
Cartema keeps two kinds of layers apart: the layers delivered to your organisation, which stay exactly as delivered, and the layers you make and maintain yourselves, which you can shape as you need — the way ArcGIS users work with feature classes.
The screenshots on this page come from Cartema's demonstration workspace: its licence blocks, holders and villages are invented.
Who can do what
| In an app with editing on | In an app with editing off | |
|---|---|---|
| Owner, admin, editor | Everything on this page | Read only |
| Viewer | Read only | Read only |
Editing is decided app by app. It is off in every app until someone switches it on, so an app of official data stays read-only whatever its layers are set to.
Switching editing on
In Studio → Apps, open the app and set Editing in this app to On. The change is saved at once and kept in the app's history. Setting it back to Off hides every tool on this page and refuses every change, without deleting anything.

Below it, the app's layer list has an Editable box for each layer: it says which layers' features can be changed while editing is on. Layers made or copied from the map are editable from the start.
Making an editable copy of a layer
To work on a layer you cannot edit — a delivered survey plan, a cadastre, a block's properties — make a copy of it that is yours:
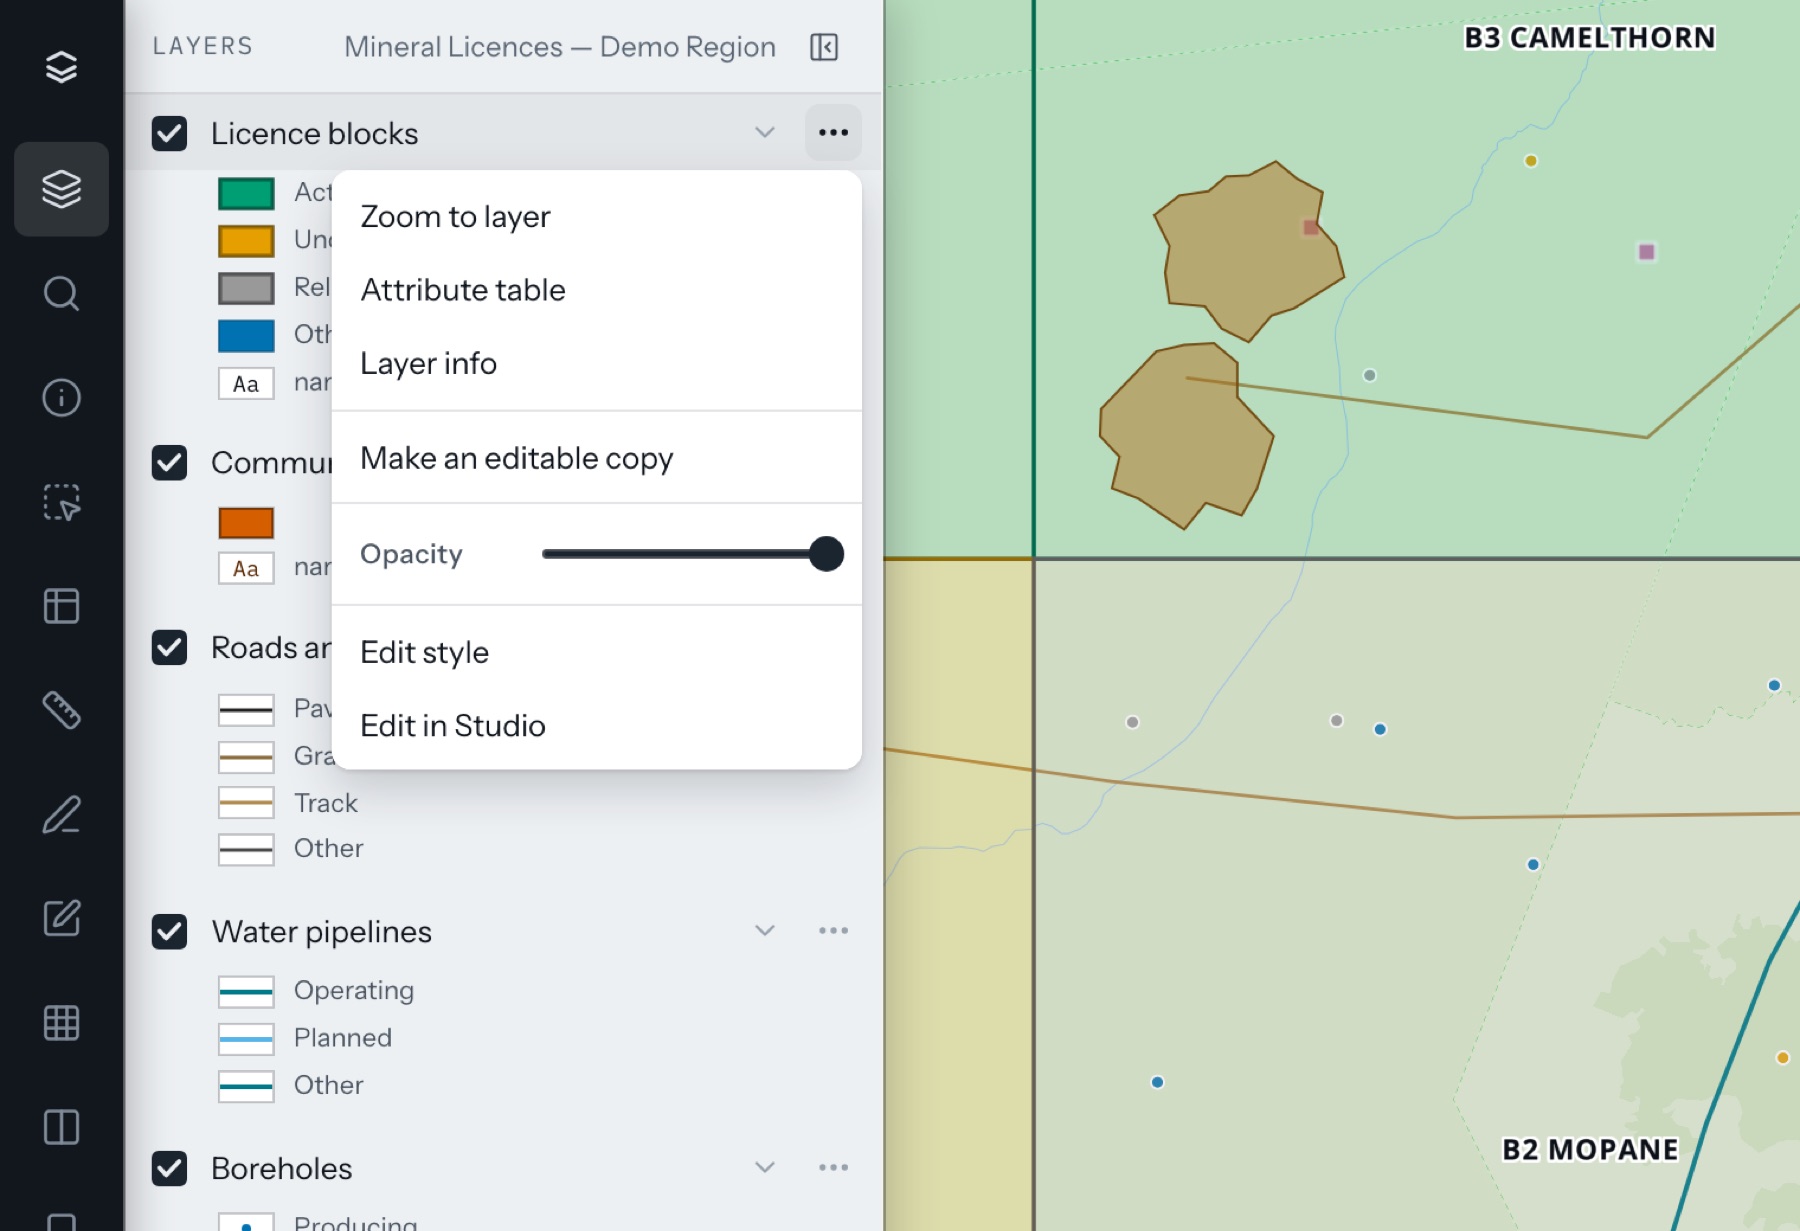
- In the layer list, open the layer's menu (…) and choose Make an editable copy.
- Name the copy and choose Make the copy.
The copy appears just above the original, switched on and editable, with every feature the layer shows (a layer filtered to one block copies that block), every attribute with its rules, and the same style. The original is not affected in any way.
Making a new layer
- Open Edit features in the left rail and choose New layer.
- Give it a name and choose Points, Lines or Polygons.
- Describe its fields. Each has an Alias (the name people read, in any language), a Column name (lower-case letters, digits and _; written for you from the alias), a Type, and under the arrow its Rules.
- Choose Create layer. It appears at the top of the app, ready for its first feature.
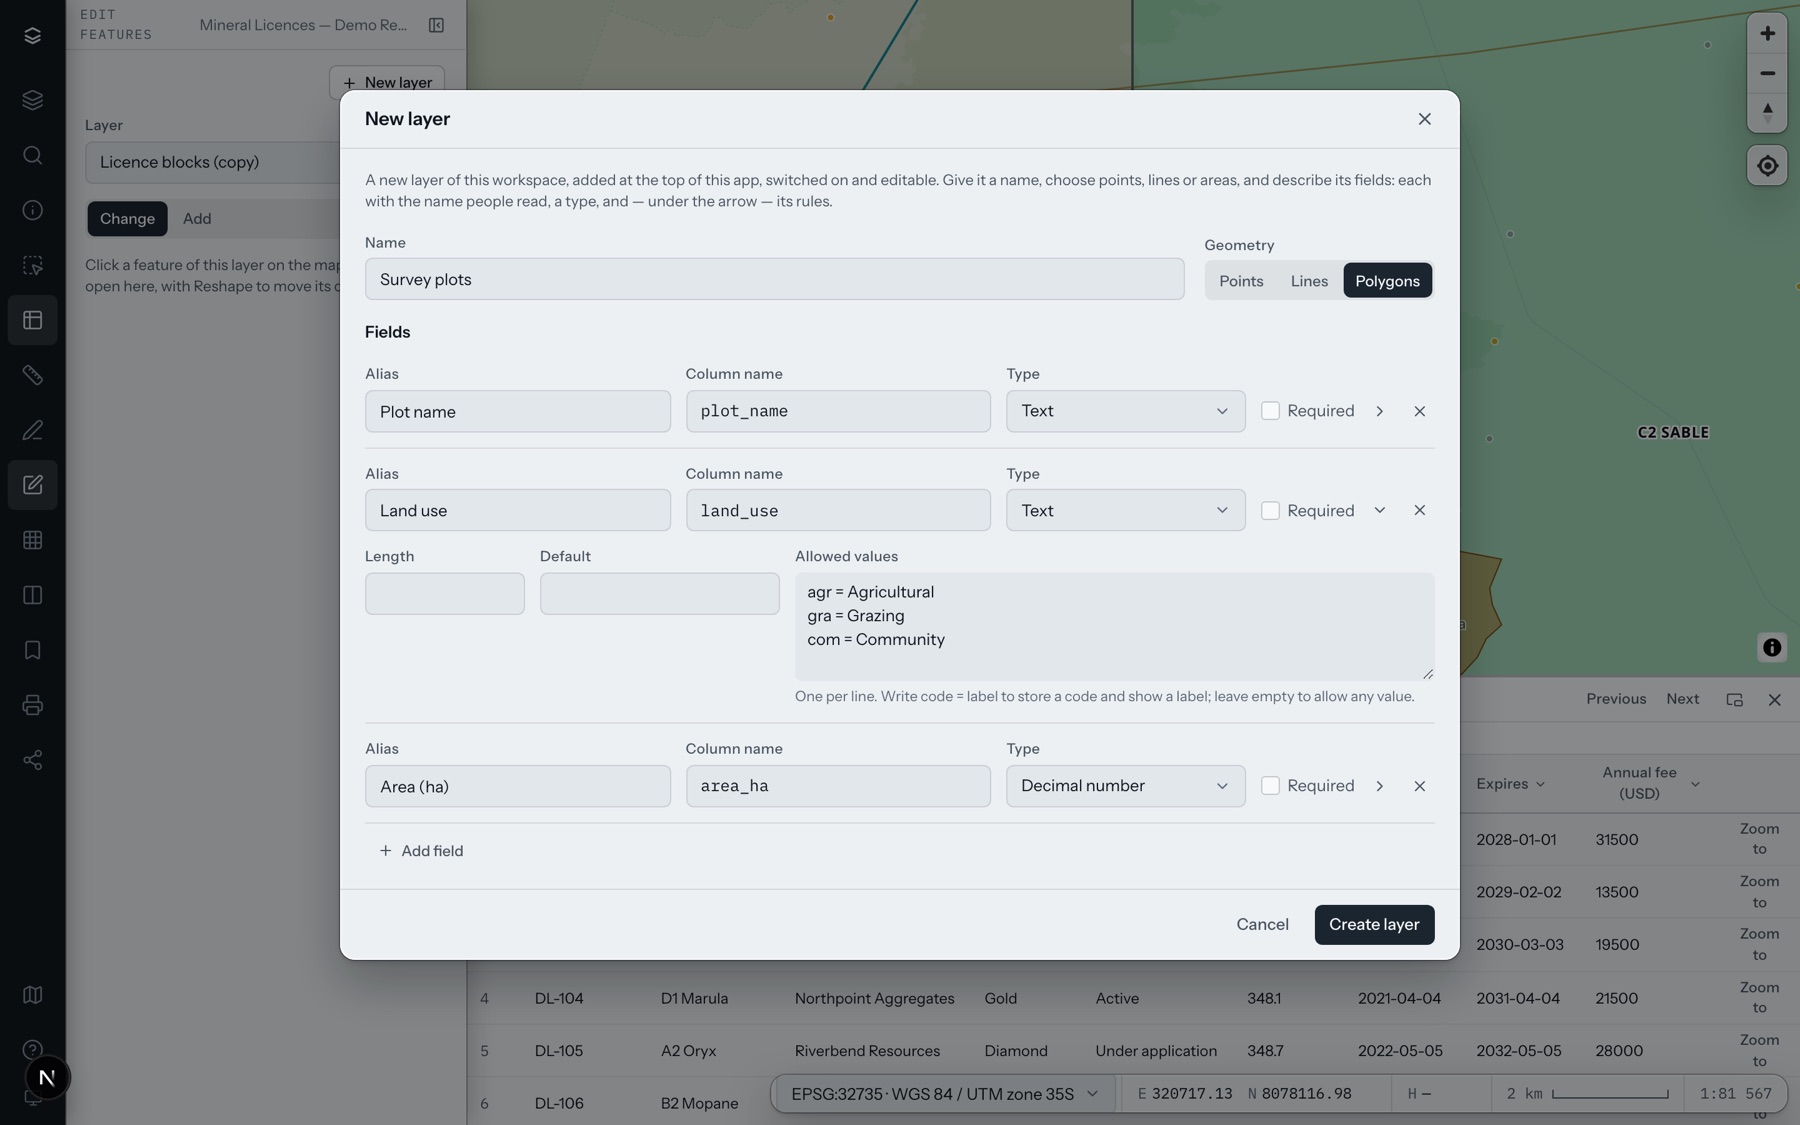
Types: Text · Whole number · Decimal number · Yes / no · Date · Date and time.
Rules:
- Required — a feature cannot be saved without a value.
- Default — the value a new feature starts with; when a field is added to a layer that has features, they all take it.
- Length — for text, the most characters it keeps.
- Allowed values — one per line;
res = Residentialstores “res” and shows “Residential”. The form then offers a list, and any other value is refused.
Drawing and changing features
In Edit features, choose the layer at the top of the panel. Only that layer's features can be picked.
- A new feature: choose Add and click on the map — once for a point, point after point for a line or an area, then Finish shape. Fill in the form and Save.
- Change a feature: choose Change and click it on the map. Its attributes open in the panel; change them and Save.
- Reshape: after clicking a feature, choose Reshape. Drag a corner to move it, drag a small midpoint to add one, press Delete to remove the corner you hold, then Save.
- Delete feature removes it, after asking.
- History, under the form, lists every change to the feature — who, what, when.
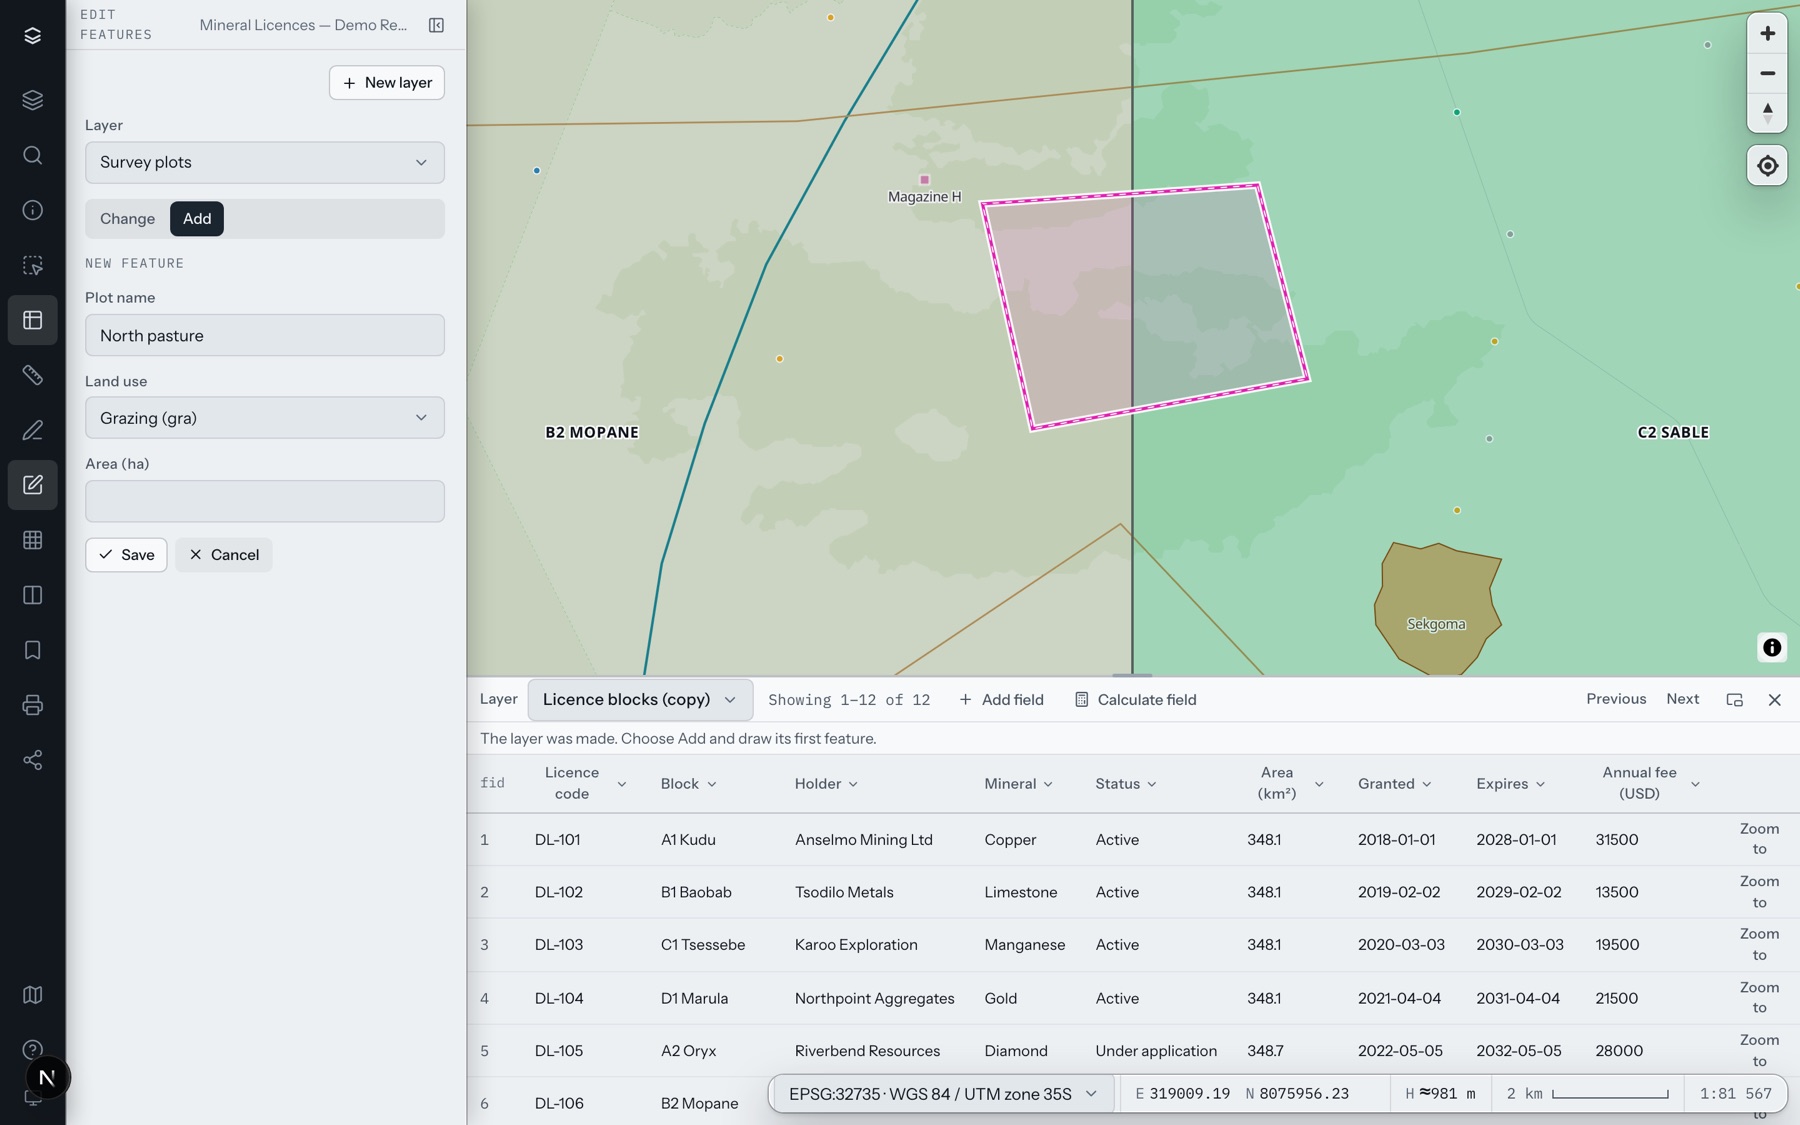
If someone else saved the same feature after you opened it, your save is refused with a message rather than overwriting their work: open the feature again and save yours on top.
Merging and clipping features
Two more tools in Edit features, as in ArcGIS: Merge joins features into one, Clip cuts features with an area you draw. Both work on the layer chosen at the top of the panel, keep a history of every feature they change, and either do everything or nothing.
Merge
- Choose Merge.
- Click the features to merge on the map — a second click takes one out again. Or select them first with the Selection tool and choose Use the selected features.
- Under Keep the attributes of, choose the feature whose name, land use and other attributes the result keeps.
- Choose Merge. The features become one; the others are removed.
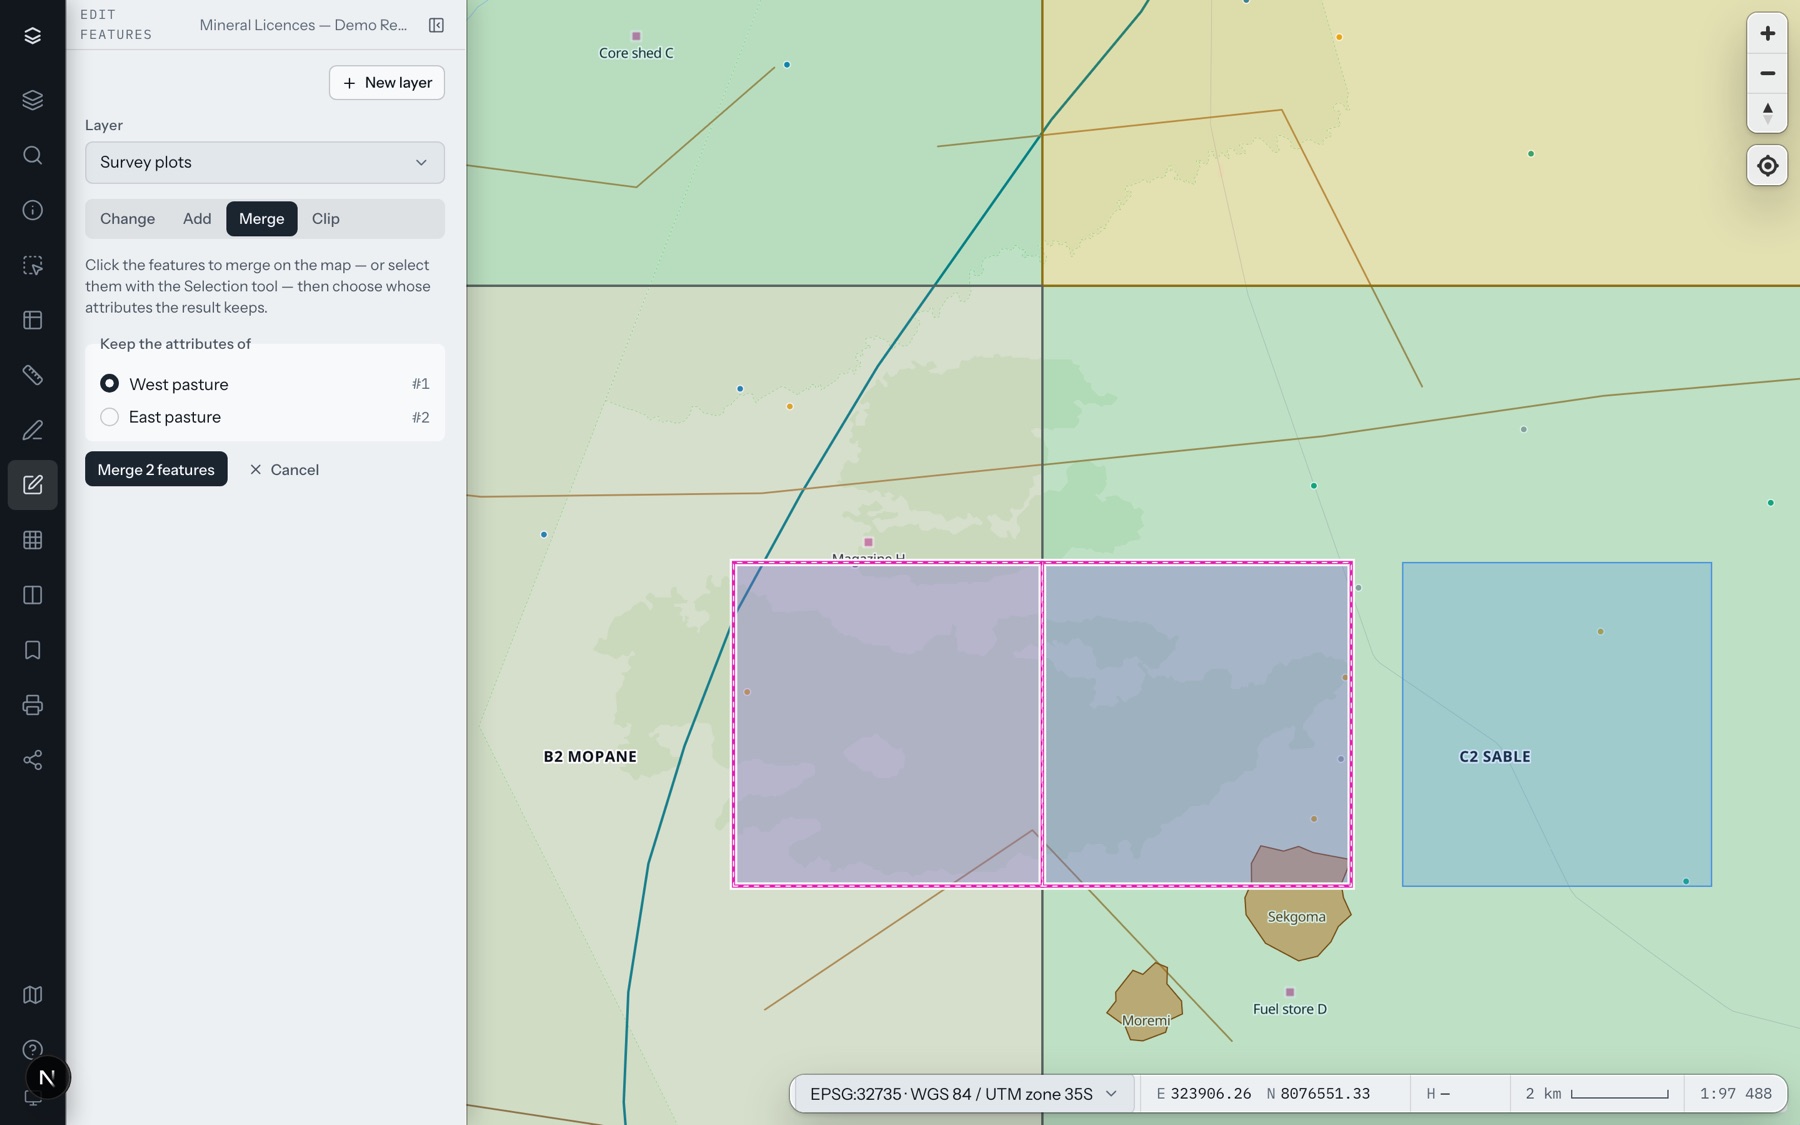
Lines that meet end to end become one line. Points cannot be merged, and a layer that takes one part per feature (delivered data often does) refuses a merge of features that do not touch.
Clip
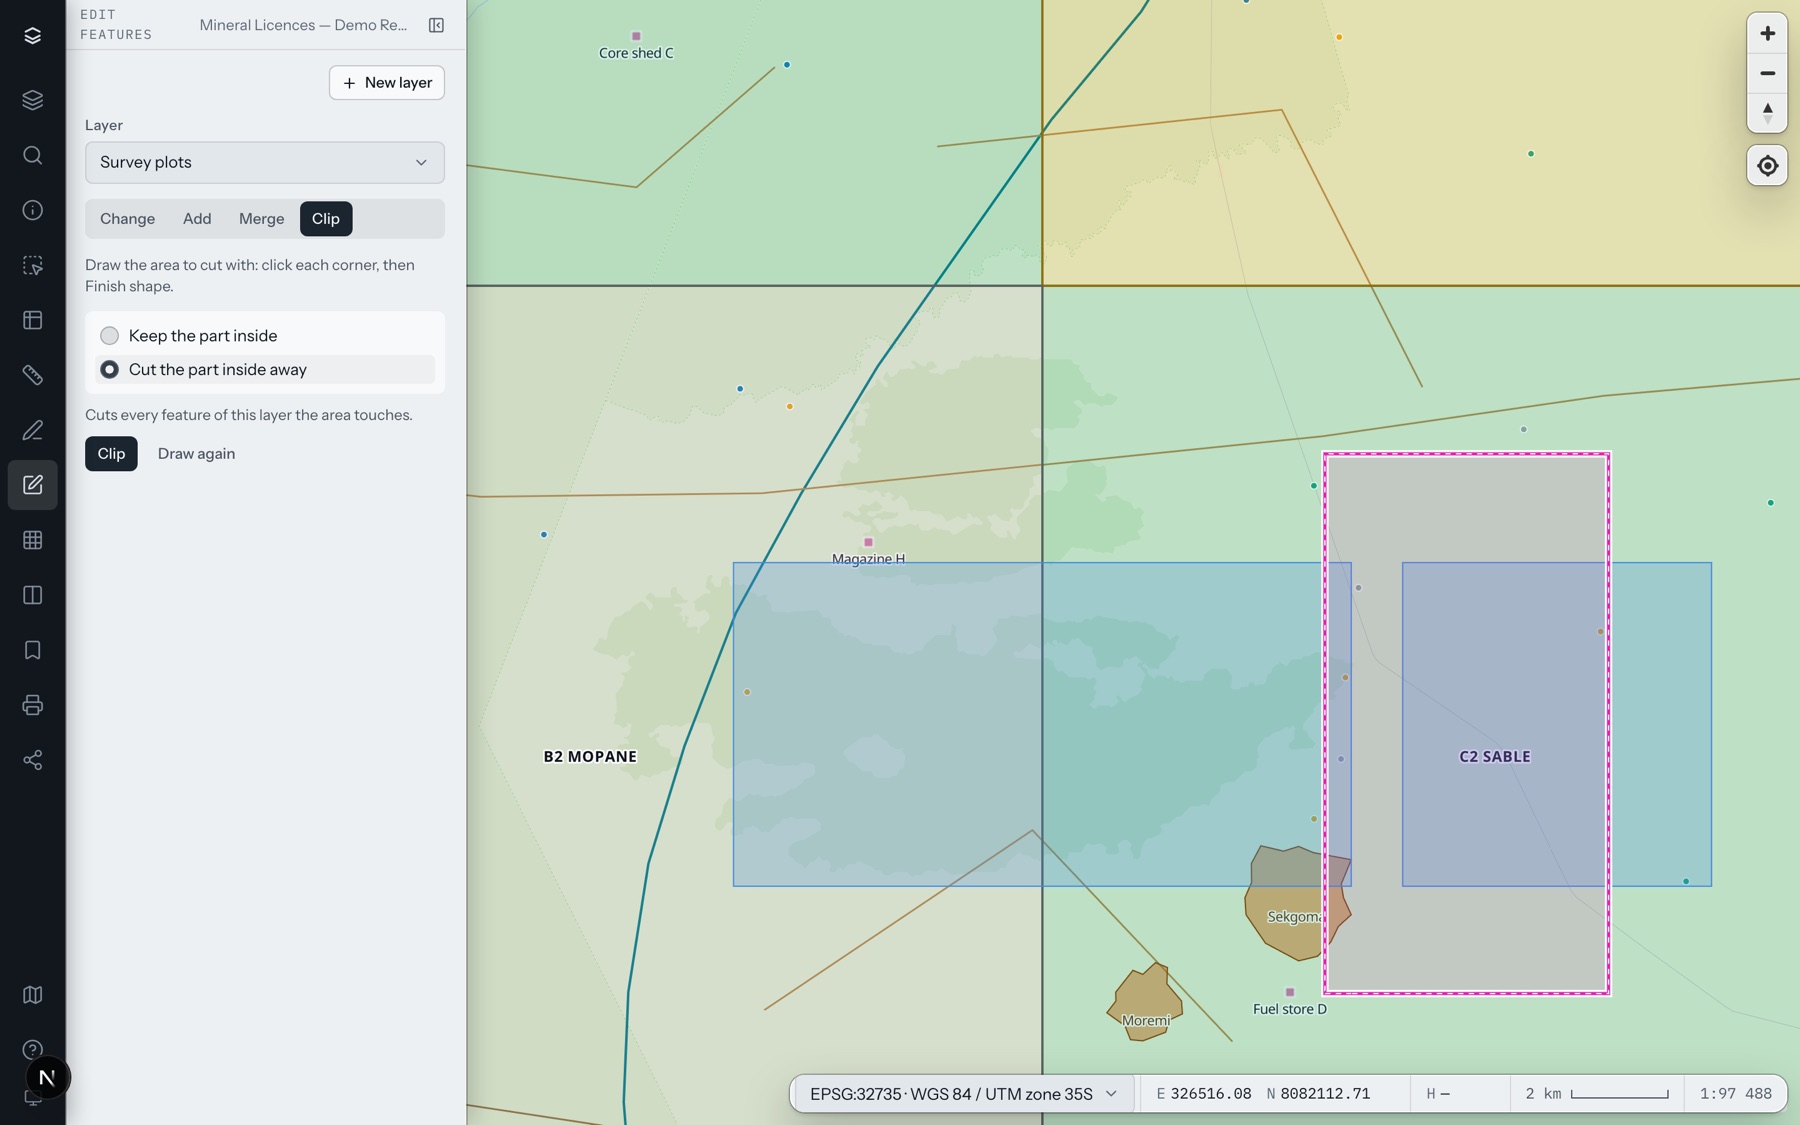
- Choose Clip and draw the cutting area on the map: click each corner, then Finish shape.
- Choose what happens: Keep the part inside the area, or Cut the part inside away.
- Choose Clip.
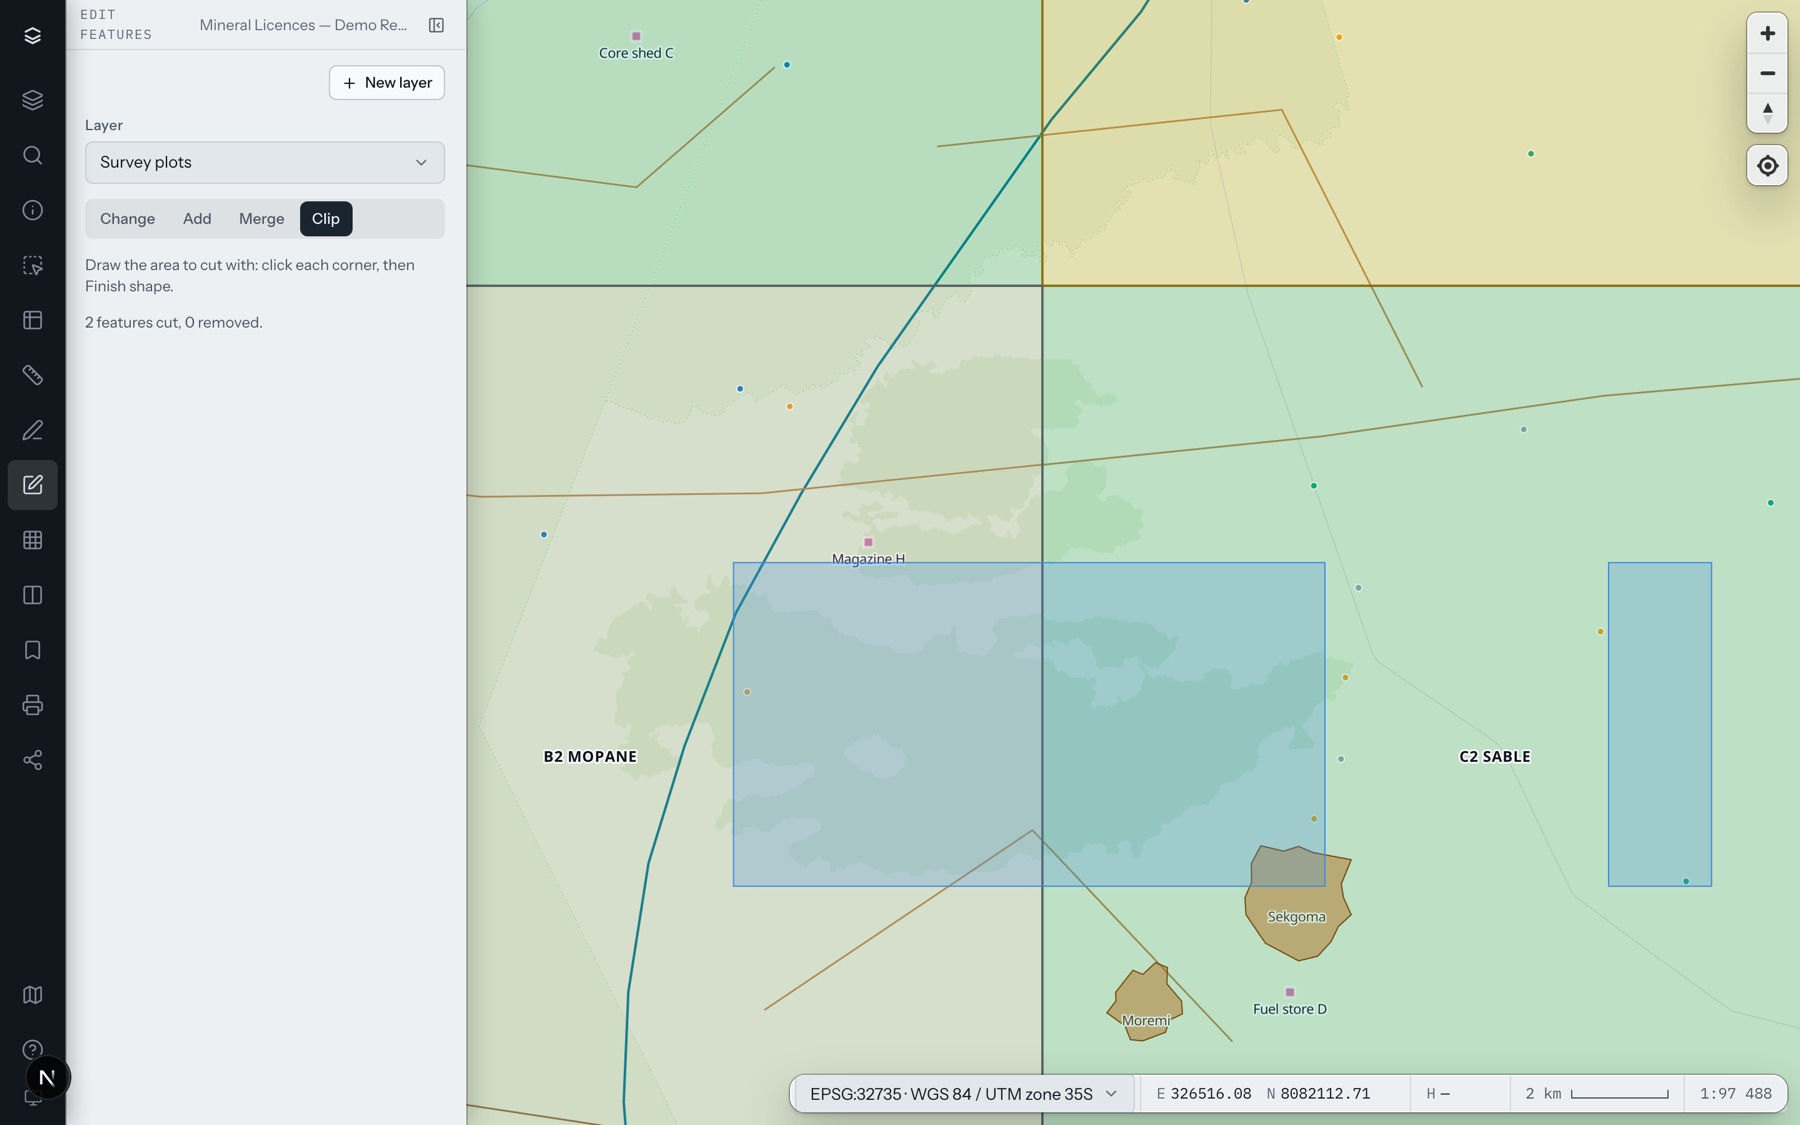
It cuts the features of the layer that are selected, if any are; otherwise every feature the area touches. A feature left with nothing is removed; the panel says how many were cut and how many removed. Draw again starts a new area.
Fields in the attribute table
Open the table with Attribute table in the rail, or in a layer's menu, and choose the layer at its top left. On an editable layer the table's bar offers Add field (on layers made or copied in Cartema) and Calculate field. Each column's small arrow opens its menu: Sort ascending, Sort descending, Calculate field, Delete field.
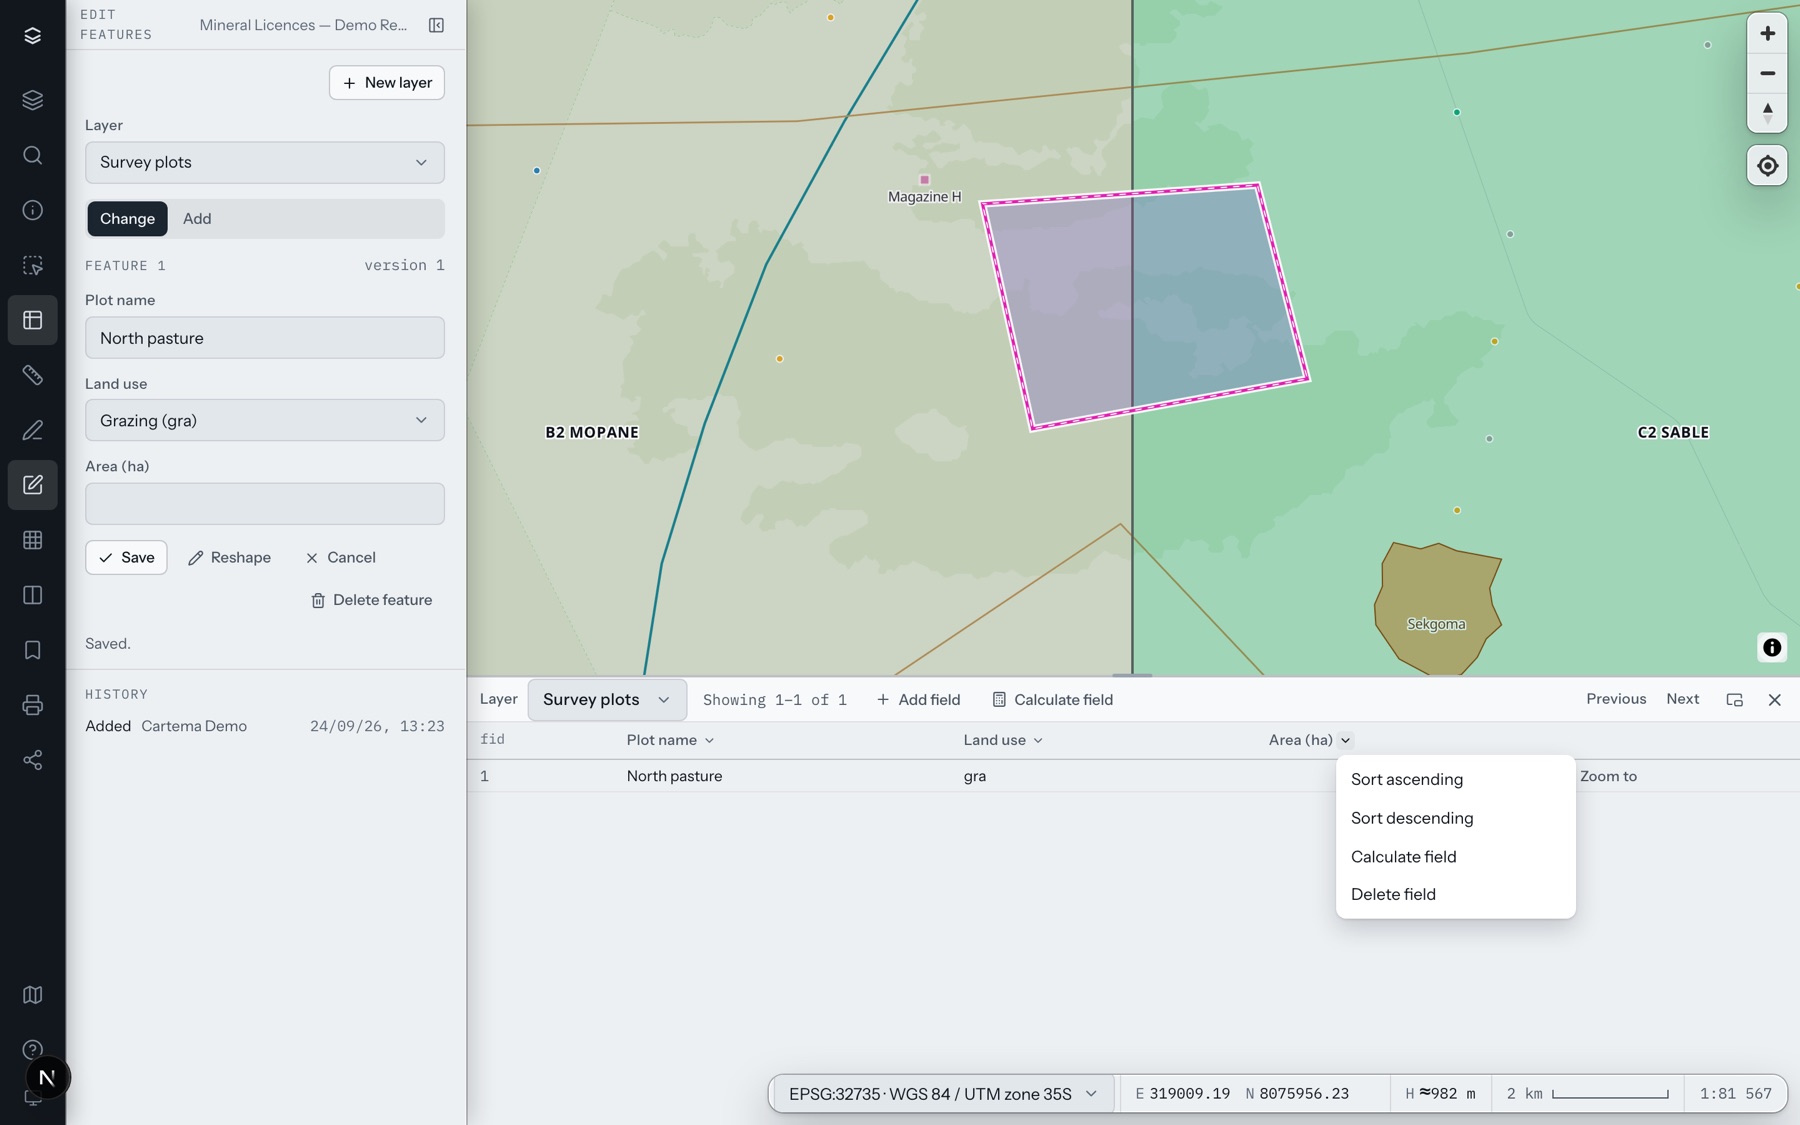
Fields can be added and deleted only on layers made or copied in Cartema: a delivered layer's columns belong to its deliveries. Deleting a field removes its values; each feature's history keeps what they were.
Calculating a field
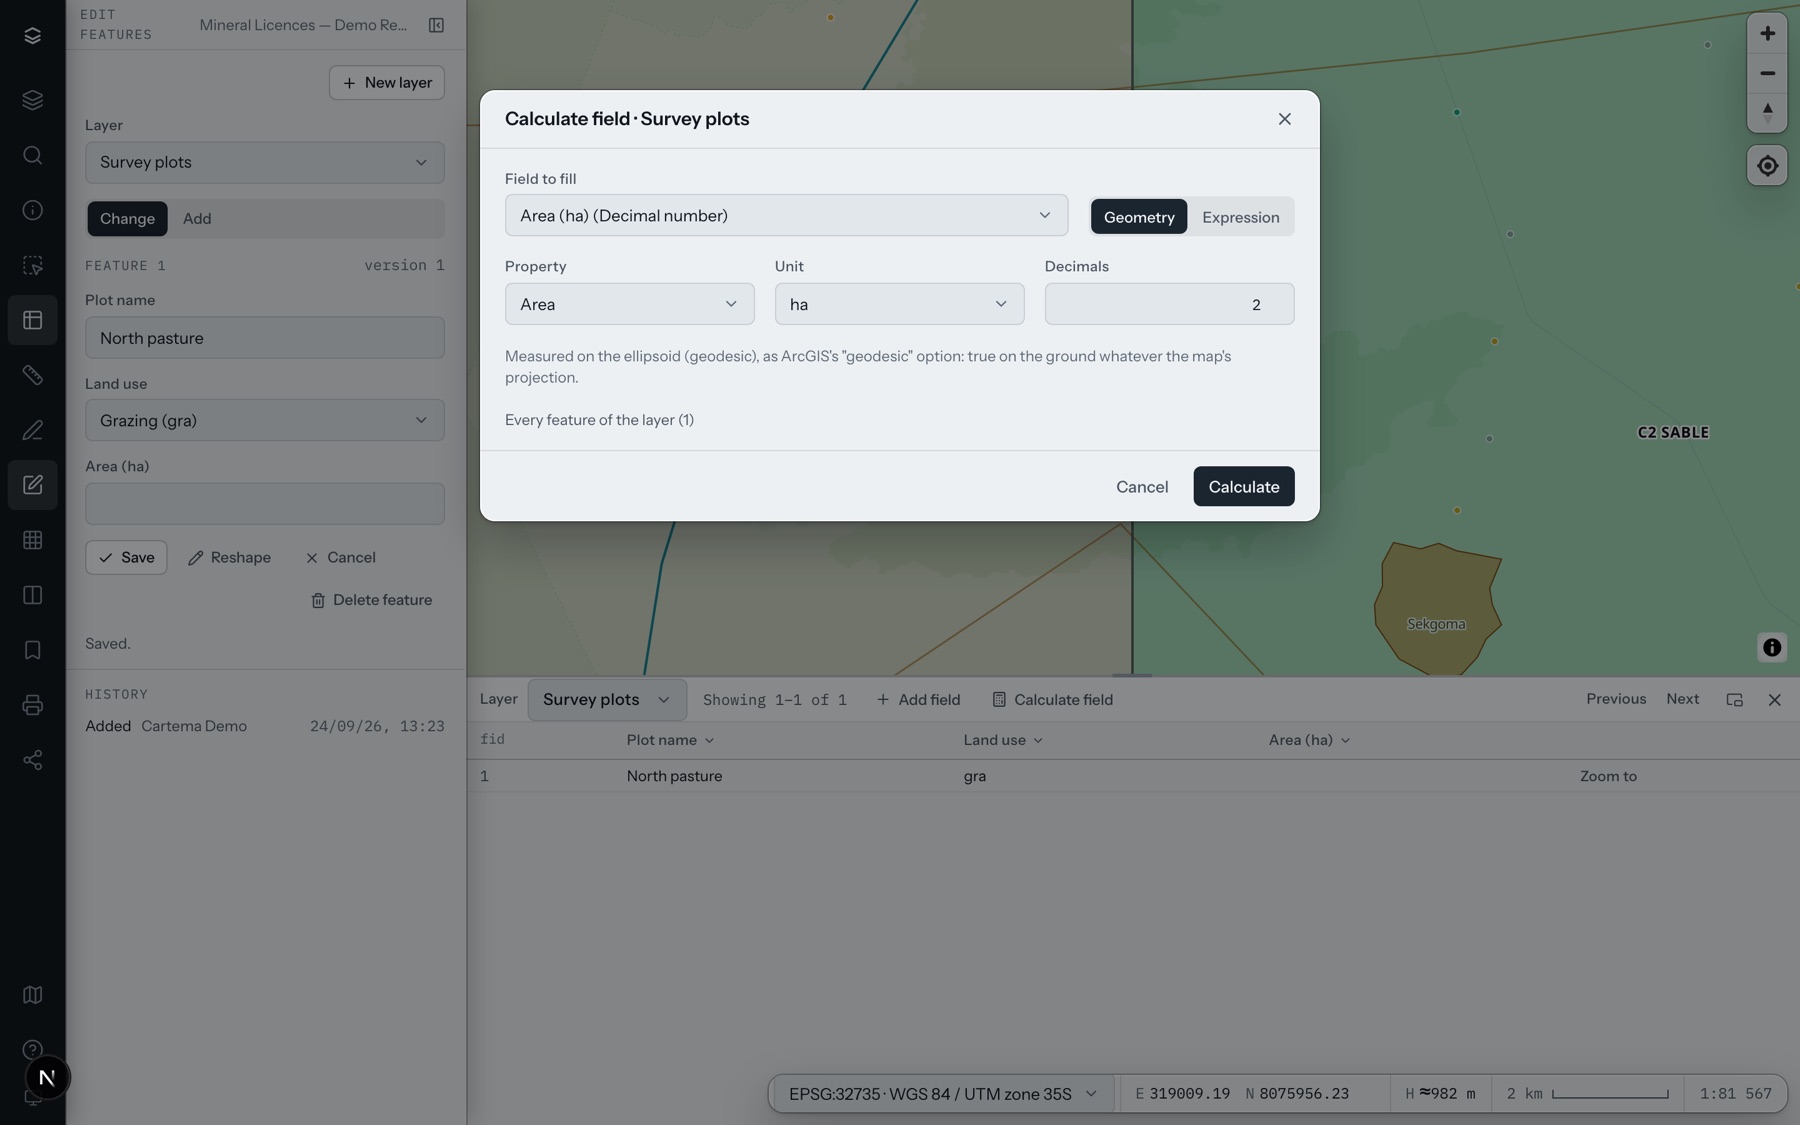
Calculate field fills a field for every feature — or only for the selected ones, when features of the layer are selected on the map.
From the geometry
| Property | For | Units |
|---|---|---|
| Area | Polygons | m², ha, km², dunam, acre |
| Perimeter | Polygons | m, km, ft, mi |
| Length | Lines | m, km, ft, mi |
| X, Y | All | In a coordinate system of the app, e.g. Israeli Grid 05/12 or WGS 84 |
Areas and lengths are measured on the ellipsoid (geodesic): true on the ground whatever the map's projection. X and Y use the same coordinate definitions as the numbers under the pointer.
From an expression
| Write | Means | Example |
|---|---|---|
[field] or !field! |
A field, by column name or alias | [area_dunam] * 1000 |
'text' |
Text (a quote inside is written twice) | 'Lot ' & [number] |
+ − * / |
Arithmetic (dividing by zero gives an empty value) | ([a] + [b]) / 2 |
& |
Joins text | [street] & ' ' & [house] |
$area $perimeter $length |
The feature's own measurement, in m² or m | round($area / 1000, 2) |
$x $y |
Longitude and latitude (WGS 84) | round($y, 6) |
fid |
The feature's number | 'P-' & fid |
Functions: round(x) round(x, n) · abs floor ceil · upper lower trim · len left(t, n) right(t, n) · concat(…) · coalesce(…) · today() now().
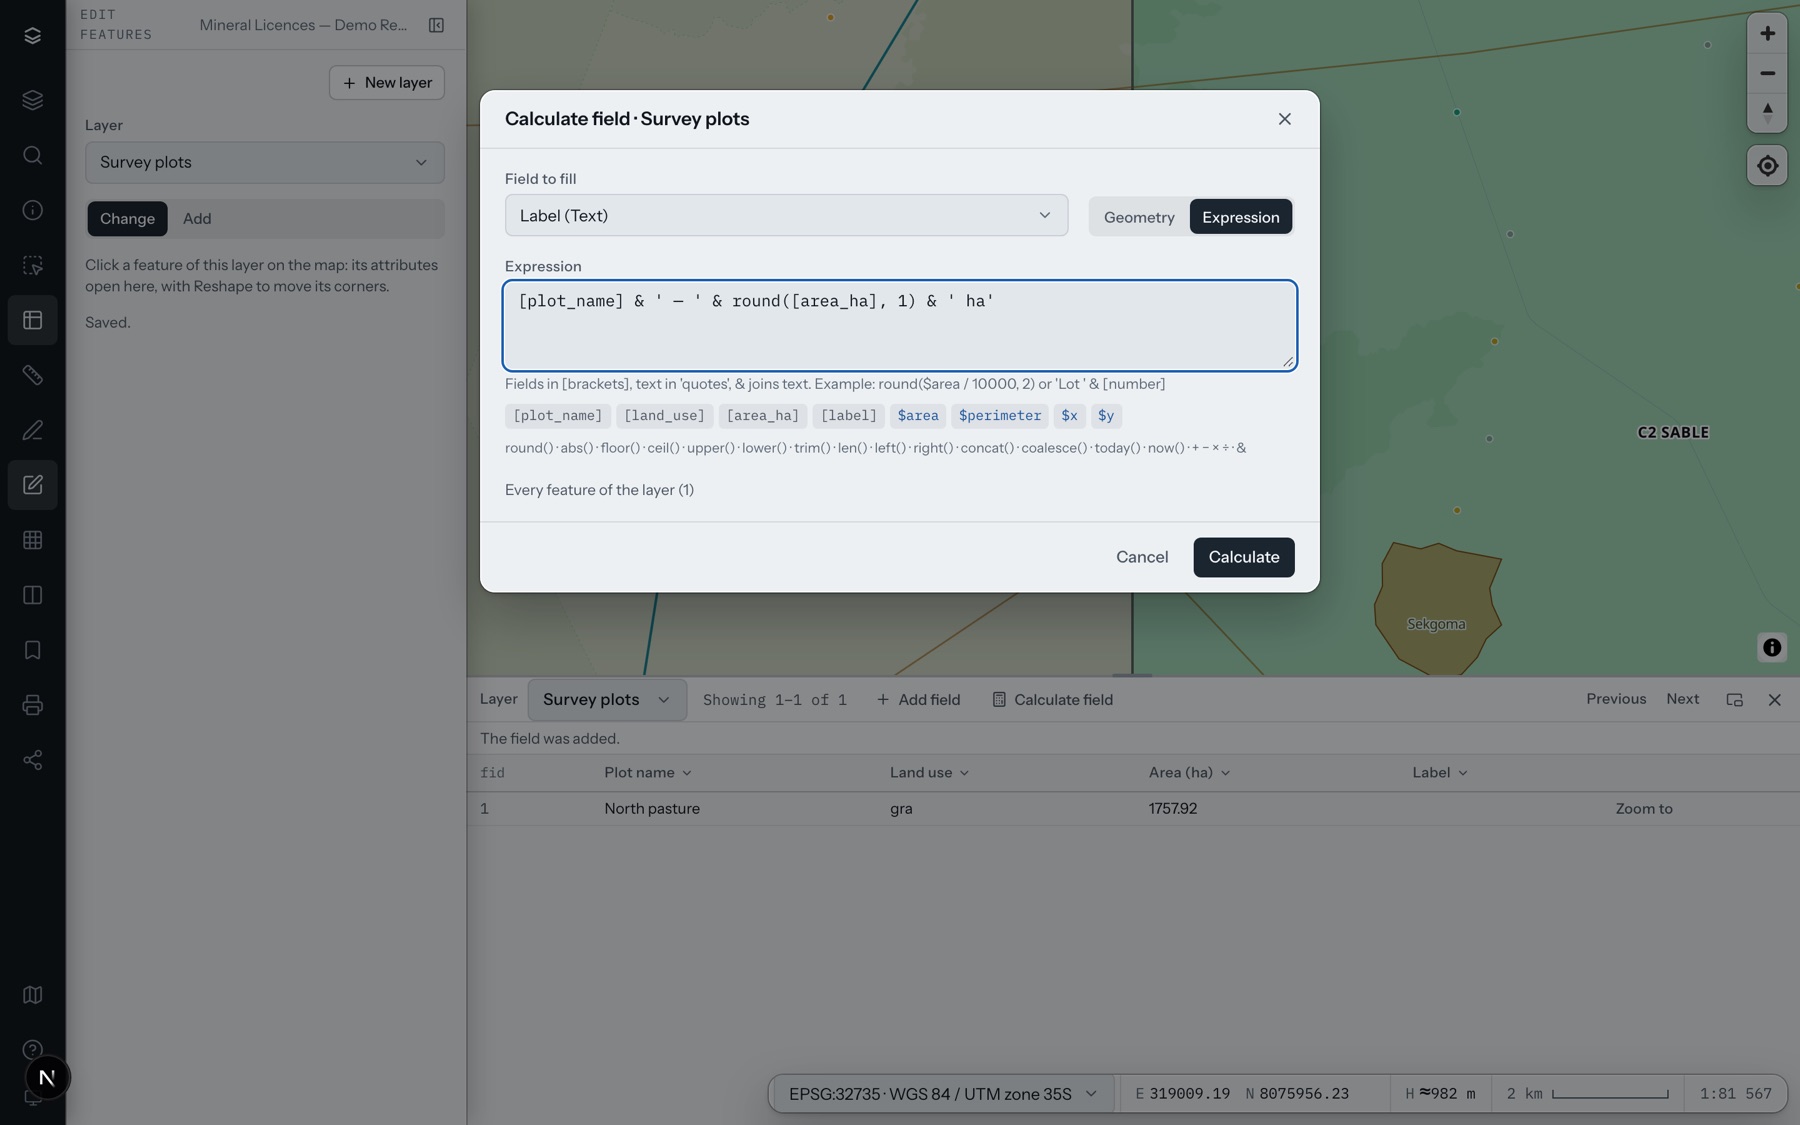
The result is written as the field's type takes it: into a whole number it is rounded, into text it is written as text. A value the field cannot take stops the calculation with a message, and nothing is written. A feature whose value was already right is left alone.
Messages you may see
| Message | What to do |
|---|---|
| editing is switched off in this app | Ask your workspace owner to switch editing on in Studio |
| this layer is not editable; make an editable copy of it first | Make a copy and work on the copy |
| fields can be added only to layers made in Cartema | The layer is delivered: add the field to a copy |
| there is no field “…” in this layer | Check the spelling; use the buttons under the expression box |
| changed by somebody else | Open the feature again and save your change on top |